It’s that looming beast of an appliance in your garage, basement, or closet: your hot water heater. Most of the time you don’t think about it, but when you do, you might find yourself wondering, Should I be doing regular maintenance on that thing?
The short answer is yes. Regular water heater maintenance can prolong the life of your water heater, make it more energy efficient, and prevent costly (and inconvenient) emergencies.
But keep in mind that your water heater has 50 gallons of piping hot water in it, so safety is key. Knowing how your water heater works and the regular maintenance it needs will help you stay safe so that both you and it can last for a good long time.
Like your Great Aunt Hilda, your hot water heater might seem intimidating, but once you get to know it, it’s not so bad.
It works like this: The cold water comes into the heater through the top, then a heating element inside the tank warms the water. Thanks to its metal interior and insulated exterior, the water stays nice and toasty inside the tank until you need it, at which point it travels through the outgoing pipe into the plumbing system in your home. Simple, right?
You’ll need to know your water heater even better if you’re going to do routine maintenance. Here are a few important parts you should know before you start any maintenance.
Water shutoff valve: This is where you’ll shut off the flow of water into your hot water heater in case of an emergency. You’ll find it on top of your water heater, right on the incoming cold water pipe. If it’s a dial, you can turn it clockwise (righty-tighty) to turn off the flow of water. If it’s a lever, then turn it until it’s perpendicular to the pipe to stop the flow.
Gas shutoff valve: Like the water shutoff valve, the gas shutoff valve is critical in an emergency. It’s usually located near the bottom of the water heater, and it’s a lever. Turn it perpendicular to the pipe to shut off the gas flow.
Drain valve: Your water heater’s drain valve is near the bottom of your tank, and it works just like the drain at the bottom of an ice cooler, only with a faucet. Turn it counterclockwise (lefty-loosey) to allow water to drain from your water heater. Use caution anytime you do this, because unlike the melted ice you’re draining out of a cooler, the water coming out of your water heater will be hot.
Pressure relief valve: This valve is designed to automatically release water or air pressure in your water heater’s tank in case the pressure builds up to dangerous levels. You shouldn’t have to mess with this valve often, but it’s still good to know where it is. It’s usually located about two-thirds of the way up your water heater, and it should have a pipe attached to it that ends a few inches above the floor. This is so that any hot water or steam escaping will be directed at the floor, not your face.
Thermostat: As the name suggests, your hot water heater thermostat controls the temperature of the water in your water heater. It’s usually located near the bottom of the water heater, and it either has a knob or a screw slot so you can adjust it to your desired temperature. The US Department of Energy recommends that you set your water heater’s thermostat at 120° F to save on energy and prevent scalding. Set the temperature lower if you’ll be away from home for an extended period of time to save energy.
Heating element: Your hot water heater’s heating element is located inside the unit, but depending on the type of water heater, you may also be able to access it from the outside. If you have a gas water heater, it’s basically like a stove burner at the bottom. For an electric water heater, it’s usually two horizontal electric rods that heat the water.
Anode rod: This is a metal rod that attaches to the top of your water heater tank and hangs down into the water. Its job is to attract any corrosive minerals that might be present in your water so that they corrode the rod, not the inside of the tank. Anode rods deteriorate and need to be replaced periodically.
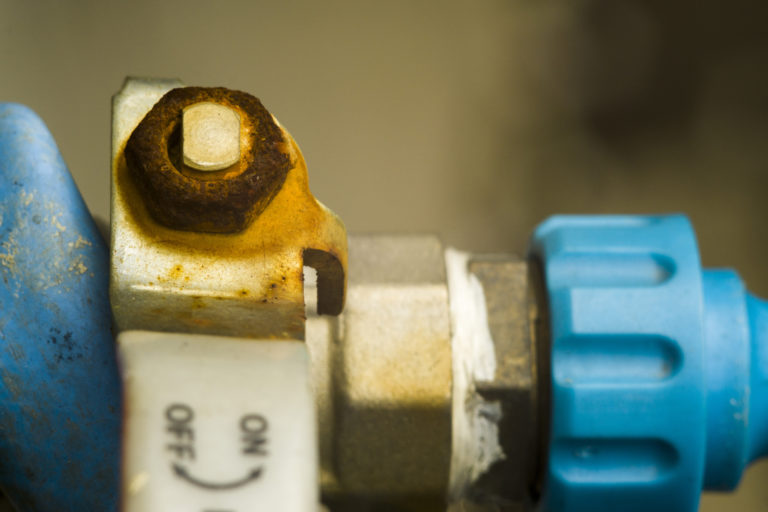
A quick visit to your water heater to inspect its pipes and valves can alert you to corrosion and leaks before they become a problem. Trust us, conducting a quick inspection once a month is a lot easier than dealing with a destructive flood from a leak that could have been avoided. To make it easy, put a monthly reminder on your calendar.
Over time, corrosive minerals from your water source can collect into a damaging sludge at the bottom of your water heater. Not only is your heater using energy to heat this sludge along with your water, but the sediment from the sludge can actually eat through the bottom of the tank. Flushing the sediment out of your tank is easy to do, and it’s one of the most important things you can do to extend the life of your water heater. You have to do it only once a year to keep your water heater running at peak efficiency. Here are the basic steps:
- Use the thermostat to turn off the heat to your unit. You’ll be draining the tank, and heating an empty tank can lead to damage.
- Stop the flow of water into the tank by turning the water shutoff valve.
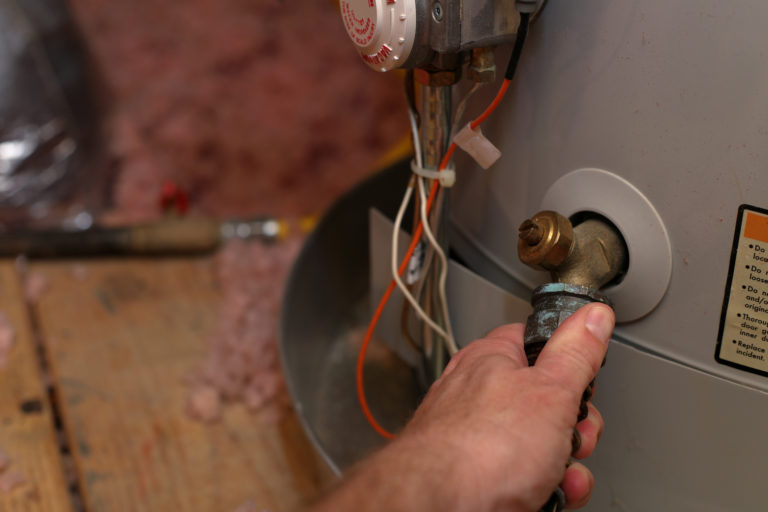
- Attach a hose to the drain valve—any garden hose should screw onto the spigot—and make sure the other end of the hose (where the water will be flowing out) is directed outdoors where the hot water coming out of the water heater can’t damage people, pets, or plants.
- Turn on a hot water faucet inside your house to equalize the pressure, or no water will drain out (any hot water faucet will do, like the kitchen sink or a bathroom sink). Without another opening, the tank will be like a straw with a thumb over the top. (If turning on a faucet doesn’t work, you may need to open the water heater’s pressure relief valve.)
- Open the water heater’s drain valve to let the hot water drain out of the tank. This should take anywhere from 15–20 minutes.
- Turn the water shutoff valve back to “open” to allow water to flow back into the tank for about 30 seconds. This will flush out anything left at the bottom. Let this drain out through the hose. Repeat this step a few times until the water coming out is free of debris.
- Finally, detach the hose and close the drain valve. Turn the water back on and let your water heater start filling back up. Once it’s about halfway full, you can turn off the faucet in the house or close up the pressure relief valve (if you used it). Once your tank is full, use the thermostat to turn the heat back up to your desired temperature.
Your anode rod is designed to slowly corrode over time so your tank doesn’t have to. But it can only do its sacrificial job for so long before it has nothing left to give, leaving your tank vulnerable to damaging corrosion. Fortunately, it’s pretty easy and inexpensive to swap it out. And just like flushing out your tank, replacing your anode rod once every four years is a great way to help your water heater work better longer.
- Purchase a new rod. Most anode rods are made of either aluminum or magnesium. The type you choose is mostly up to you, but it’s important to check your current anode rod for sizing and to see how it connects to your water heater. You want to make sure you get a new one with the right type of connection. As you’re picking out your new rod, also be aware of headroom. Anode rods are long, and they insert through a small opening in the top of your water heater, so if there’s not much space between the top of the water heater and the ceiling, we recommend getting a segmented anode rod.
- Get Teflon tape to give you a nice, tight seal where you attach the rod. Wrap some tape around the threads at the top of your new anode rod.
- Use the thermostat to turn off the heat to your water heater, and use the water shutoff valve to cut the water supply while you’re working.
- Follow the same procedures for flushing out your tank, but instead of draining the whole thing, just take out about two gallons. Remember to use caution—the water will be hot!
- Remove the plastic cap at the top of the tank to expose the top of the old anode rod. Using a socket wrench, unscrew the rod and carefully take it out. Once again, be very careful, because it will be hot. It’s a good idea to have some rags on hand for handling the rod and for cleaning up any dripping water.
- Fit your new rod down into the opening left by the old one, and use your socket wrench to secure it in place. If it’s too long, you can use a hacksaw to cut it down to size.
- Once the new anode rod is in place, go ahead and refill your tank using the water shutoff valve, checking for leaks around the anode rod fitting. If everything looks good, replace the plastic cap and reset your water tank’s thermostat, then pat yourself on the back for giving your water heater a new lease on life.
Your water heater might seem like a beast of an appliance, but if you treat it well by giving it regular attention, it’ll treat you well in return. Make routine maintenance on your water heater a regular part of your home maintenance schedule and you’ll have nice warm showers for years to come.
For more home safety tips, check out our Ultimate Room-by-Room Guide to Home Safety.