Google Nest has cameras that livestream footage from inside or outside your home. Whether this is your first camera installation or one of many, we’ve laid out installation instructions for Nest’s indoor and outdoor cameras.
How to Install Nest Cameras Indoors and Outdoors
Why you can trust SafeWise
products considered
250+
research hours in 25+ in-home tests
10k+
years of combined experience
176+
homes and people protected
10M+
For over 13 years, SafeWise experts have conducted independent research and testing to write unbiased, human reviews (not robots). Learn more.
How to install a Nest Cam
Do you have your Nest camera ready? Click on one of the links below to jump to installation instructions for your camera.
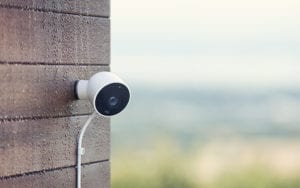
How to install a Nest Cam Outdoor
Nest Cam Outdoor cameras are awesome additions to your Google-compatible home security or surveillance system. They have excellent night vision and powerful livestreaming features like motion detection and two-way audio.
Here’s what you’ll need to start installing your Nest Cam Outdoor.1
- A strong Wi-Fi signal (2 Mbps upload speed or higher)
- A mobile device with the Nest app installed
- An active Nest account
- An indoor or outdoor power outlet
- A power drill with Phillips driver bit or standard Phillips screwdriver
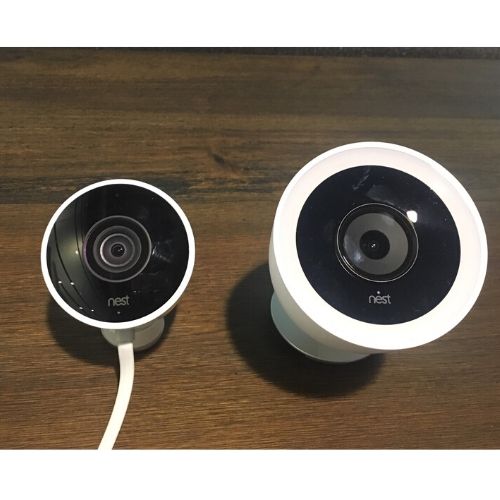
Image: SafeWise
What's in the box
Be sure to check your Nest camera box to make sure all the pieces you need come included.
- Nest Cam Outdoor
- Power adapter
- Mounting magnet
- Camera wall plate
- Adapter wall plate
- 12 wall screws
- 12 wall anchors
- 9 cable clips
- Instruction manual
1. Pick an installation spot
Before you get started with installation, figure out where you want to put your new Nest camera. Avoid areas with direct sunlight or plants that might block the picture.
Make sure your camera can still receive a signal from your home router too. Nest recommends finding a spot about 7 to 10 feet off the ground for the best results.
Your Nest Cam Outdoor doesn’t have batteries, so it needs to stay plugged in at all times. Find an outdoor plug with a cover or choose a spot where a cord can reach indoors. Like the Nest Cam IQ, you can drill a hole into your house and feed the cord through that.
2. Turn on and activate your camera
Once you’ve picked a location for installation, get started by activating and registering your camera.
You’ll need to have the Nest app and your account login. Follow the instructions on the app to add your new camera to your Nest account. The camera’s livestream goes straight to the app, so you can check the picture quality and test the camera out before installing it.
3. Take it outside
When you see live footage on the Nest app, your Nest Cam is ready to go outside.
Take your Nest camera outdoors and plug it into an outlet inside. Be sure it can still livestream from the location you’ve picked. You’ll need a strong Wi-Fi connection for the best experience with a security camera like Nest.
If you can’t see a livestream from the camera on the Nest app, you may need to pick a spot closer to your router or move the router closer to the camera.
4. Install the mounting magnet
Your Nest Cam uses a super strong magnet to stick to the wall mount. Start by marking pilot holes on the wall or post where you’ll install the camera. Use wall anchors and masonry drill bits if you’re mounting your camera to brick or stone.
Secure the mounting plate to the wall with two of the included screws.
5. Add the camera
Once the mounting magnet is securely placed on the wall or post, place your camera on the magnet. You can adjust the angle by looking at the livestream from the Nest app. Be sure it’s in a spot with a clear view, free from direct sunlight, plants, and structures that might block the picture.
6. Plan your wiring path
Unless you have the Nest Cam Battery, your Nest camera needs to be plugged in at all times, so be sure your cable can reach an outlet comfortably. You’ll have about 10 feet of cable to work with and cable anchors to keep the cord from coming loose.
Nest recommends leaving a little slack on both ends of the cable to provide enough cabling to reach. We recommend hiding the cable or keeping it high on the side of your house to prevent tampering. Outdoor plug covers can protect your outlet and the cable inside.
7. Mount the power adapter and secure the cable
Install the weatherproof adapter around 18 inches off the ground and flush against the wall. Use one of the provided screws to secure the wall plate then snap the adapter to the wall plate.
Next, secure the cable with the provided cable clips and screws. There are nine clips in the Nest kit—use as many as you need to keep the cable secure.
Secure the cable in a hidden or out of reach spot to avoid tampering. You can paint over the cable to camouflage it too.
Once you’ve finished installing your Nest Cam Outdoor, check the livestream and make adjustments for the best picture.
How to install a Nest Cam IQ Outdoor
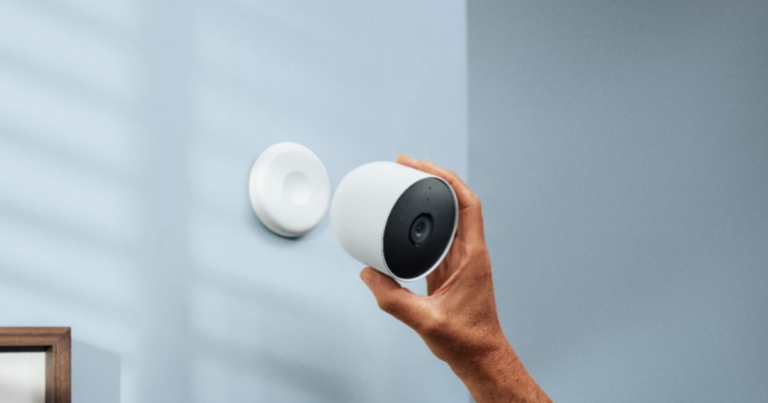
Image: Google
The Nest Cam IQ Outdoor camera has a 4K sensor that provides a crystal clear picture in broad daylight or the middle of the night. Its 12x digital zoom is powerful enough to capture license plates and faces from far away. It’s also easy to set up. Follow these installation instructions to get your Nest Cam IQ Outdoor up and running.2
Here’s what you’ll need to get started.
- A strong Wi-Fi connection (with at least 2 Mbps upload speed)
- The Nest app and account
- An indoor power outlet
- A power drill with Phillips bit
Optional, but recommended from Nest:
- 3/32-inch drill bits for pilot holes
- 7/32-inch drill bits for wall anchors
- ½-inch drill bits for cable hole
- Caulk to seal the wall plate
- A ladder if you’re installing higher on the wall
What's in the box
- Nest Cam IQ Outdoor
- Wall plate
- 12 screws
- 25-ft outdoor power cable
- 8 cable clips
- 12 wall anchors
- Indoor power adapter
- Hex key
- Power cable strap
- Instruction manual
1. Choose an installation spot
Before you pick up a drill, scout out a good spot to place your new Nest Cam IQ Outdoor. The power cable for the IQ Outdoor camera is 25 feet, so measure out this distance before doing any installation.
It will need to be close enough to your router to receive a Wi-Fi signal and an indoor plug to get power. It also helps to plan your cabling path before starting installation.
Look for a spot that won’t be blocked by trees, bushes, or direct sunlight. The side of your garage, near a gate, or near your back door are all good places to start.
2. Activate Nest Cam IQ Outdoor camera and add it to your Nest account
Start inside your house by plugging your Nest Cam IQ Outdoor camera into an outlet and adding it to your Nest account.
Download the Nest app and log in using your account information. Follow the instructions to add your new camera to your account. You’ll know the camera is up and running by the live video feed in the app.
3. Take it outside
Keep your camera plugged in and take it where you want to install it. Check the live feed to see how the Wi-Fi connection holds up. If the video starts lagging or freezing, the connection may not be strong enough for reliable footage.
You can choose a new spot for installation or move your router closer to where you want to install the camera.
4. Mount the wall plate
The Nest Cam IQ Outdoor has a wall plate with a hole through the center for the power cable. You can either drill through your outside wall and run the cable through or lead the cable around and into the plate. This step is why planning a cable path beforehand is so important.
The good news is either option works. If you’re drilling into brick or stone, you’ll need a masonry drill bit and the wall anchors included with your camera.
Once you’ve picked a spot, use the wall plate to mark where to drill. Use a 3/32-inch drill bit to create pilot holes for the wall plate. If you’re using wall anchors, choose a 7/32-inch bit for the wall anchors.
Seal the plate with caulk, leaving a small gap for water to drain.
If you’re drilling through the wall, place the wall plate over the hole and route the cable through. If not, route the cable through the indented space on the wall plate for the cord to connect to the camera.
Nest has a helpful video to show you how this step is done.
5. Add the camera
Once the wall plate is in place, you can add your Nest Cam IQ Outdoor camera. Plug the cable into the back of the camera and click it into place on the wall plate.
When the camera receives power, it will connect to your Wi-Fi and you’ll be able to see video feed through the app. Adjust the camera to improve the picture.
6. Secure the cable
After you’ve positioned your camera, secure the cable. The Nest Cam IQ Outdoor comes with 8 cable clips you can use to hold the cable to an inside or outside wall. Use as many as you need.
For a neat cable path, follow a ledge or corner with your clips. You can paint over the cable, but we don’t recommend painting the camera itself.
7. Test your camera
Finally, make adjustments as needed to your camera’s position or its cable. Check the camera’s two-way audio, zoom, and activity tracking to make sure all its features work.
How to install a Nest Cam Indoor and IQ Indoor camera
The Nest Cam Indoor and Nest Cam IQ Indoor cameras have the same installation steps. It just takes a few minutes and most of the setup can be done on your phone.3
Here’s what you’ll need to get started.
- Nest Cam Indoor or Nest Indoor IQ camera
- The Nest app (for tablet or smartphone)
- An indoor outlet
- Wi-Fi network with 2 Mbps upload speed or higher
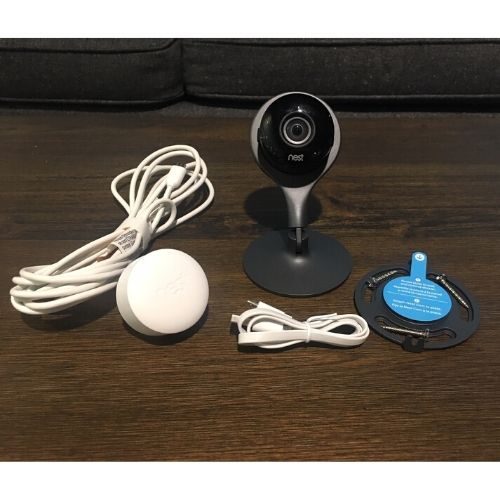
Image: SafeWise
What's in the box
- Your Nest Cam Indoor or Nest Indoor IQ camera
- Power cable and wall plug
- 2 screws
- Mounting plate
1. Download the Nest app and register
Start your Nest camera installation by downloading the Nest app onto your phone or tablet. The app works for Android devices 5.0 and up and iOS devices 12.0 and later. Once the app is on your device, open it up and sign in using your Nest account login.
2. Plug your camera in
Now it’s time to power up your Nest Indoor camera. Both the IQ and standard indoor cameras can stand up on their own. So plug the power cord into the camera and the wall, and leave the camera on a stable surface while you’re installing it.
The Nest cam will chime when it starts up. If you have the Nest IQ Indoor camera, you’ll also see a blue ring of light around the lens.
3. Add your camera to your Nest account
Sign in to your account if you aren’t already in. Once you’ve logged in, tap the plus sign to add your new device. If you already have Nest products on your account, tap the Settings icon, and find Add Product to continue.
From here, the app will ask you to scan the QR code on your new camera. Line up the QR code with the green box in the app so it can read it. This doesn’t have to be perfect, but it helps to do this step in a well-lit area without shadows.
4. Name your camera
Next, name your camera to reflect its location. The app will provide a few popular options like “living room” or “kids’ room” that you can choose from.
The name you assign your Nest Cam Indoor or IQ Indoor will appear when the camera sends notifications to your phone. So choose a name that makes sense to you.
5. Connect to your home Wi-Fi
Now it’s time to connect your camera to the home Wi-Fi. The app will lead you to this step once you’ve named the location of the camera. Find your home network and type in the password.
If you already have a Nest product
Existing Nest products in your home may interfere with the Wi-Fi connection step. If this becomes a problem while you’re setting up, try moving your new camera closer to the router or the other Nest product. The app can assist with this step. If you’re still having trouble, visit nest.com/pair for assistance.
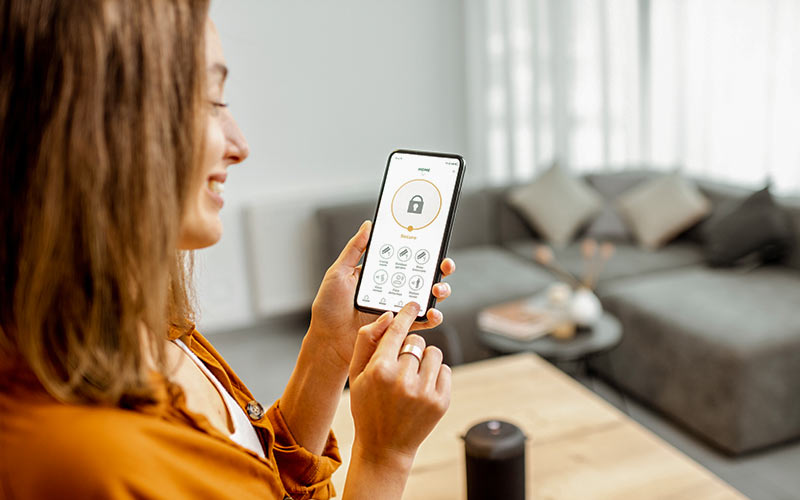
6. Place your camera and make adjustments
Once your camera is connected to your home Wi-Fi and the Nest app, you’re done! Check the Nest app to see what the camera sees and put it into position. Both the Nest IQ and standard Nest Cam Indoor have wide views, allowing them to see most of a room and make out people’s faces.
Avoid placing your camera in direct sunlight or facing out the window. This can distort the picture. While making adjustments, try zooming in and looking for obstacles in its path.
Finally, test the video stream to make sure the picture captures what you want to see.
7. Optional: Mount your camera
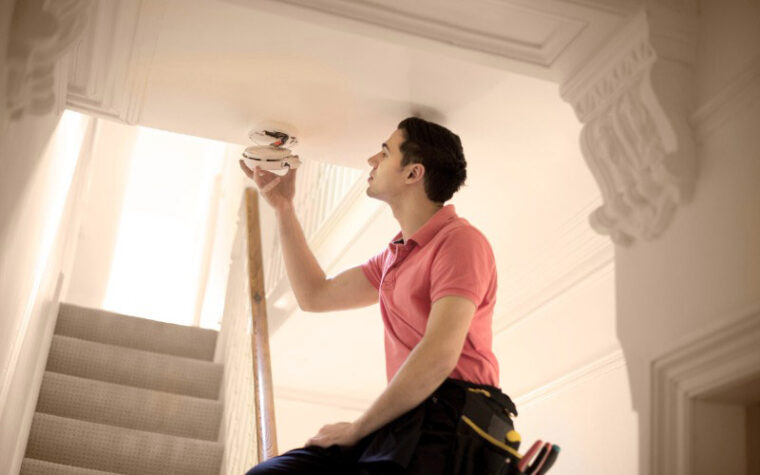
This is an optional step, but you can mount the indoor camera to the wall of the nursery, hallway, or anywhere you’d like. You’ll just need a Phillips screwdriver or power drill with a Phillips bit. If you’re installing your camera onto a hard surface like brick or stone, you’ll need a masonry drill bit.
- Test the Wi-Fi connection on the wall first. You’ll want to make sure the camera has a good connection before mounting it to the wall.
- Mark holes on the wall with a pencil using the wall mount so you know where to place the screws.
- Use the two included screws to mount the plate to the wall.
- Place the camera on the wall mount, and you’re done!
Nest Doorbell installation
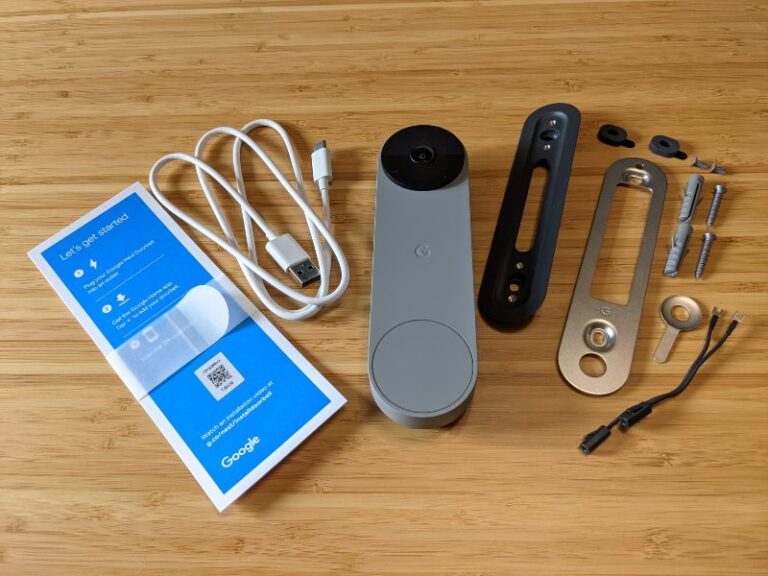
Image: SafeWise
Although installing a Nest doorbell camera is a straightforward task, small variations depend on choosing a wired or battery-powered installation.
Doorbell wiring
We prefer using existing doorbell wires with video doorbells since you have a way to charge batteries without dismounting the camera every couple of months to charge via USB. It also connects the doorbell to a mechanical chime inside your home so it can work as a low-tech doorbell button when you're not recording video.
Wired installation requirements
Nest Doorbells should work with most doorbell transformers:
- 8–24 volts AC for Nest Doorbell (Battery); 16–24 volts AC for the Nest Doorbell (Wired)
- 10 VA transformer
The entire install process takes about 15 minutes with the following steps:
1. Charge the doorbell if using a Nest Doorbell (Battery).
2. Install the Google Home app on your phone and sign in with your Google account.
3. Set up your doorbell using the app.
4. Turn off the power to your existing doorbell and remove the old button to access the wiring behind.
5. Install the Nest doorbell mounting bracket where the old button was.
- Install the included wedge first if you choose to use it.
6. Attach the included wiring connectors to the back of the doorbell—it doesn't matter which wire goes on which screw.
7. Insert the doorbell wiring into the connectors and thread the excess wires into the wall before mounting.
8. Press the doorbell against the bracket and pull it down to lock it in place.
This process is the same for both Nest video doorbell models, though you might need to install an additional chime connector with the Nest Doorbell (Wired).
What is the Nest chime connector for?
Mechanical doorbell chimes use an open electrical circuit to work—pressing a doorbell button completes the circuit to ring the chime. Unfortunately, an open circuit isn't a great power source for a video doorbell. This is where the chime connector comes in. It allows the Nest Doorbell (Wired) to access power without constantly ringing the bell or creating a buzzing sound.
Battery power
If you want more flexibility to install your doorbell wherever you want, then the Nest Doorbell (Battery) can work anywhere it has a Wi-Fi connection. The installation process is simpler, though you need to remove the battery for recharging. It comes with a USB-C charging cable and no USB adapter, but the odds are high that you have a spare adapter in your junk drawer.
Professional installation options
While this is an easy DIY project, you can also pay for professional installation:
- Google Store: $99 on the first device and $59 for each device after that
- Retailers with installation services—Best Buy charges $99.99, for example
- Hire a local electrician
Nest Camera Installation FAQ
No. Unfortunately, you’ll need to keep the camera plugged in at all times for it to work. If the wire disconnects or is cut, you’ll get a notification on the Nest app that the camera has lost power.
Google Nest has standard and premium cameras for indoors and outdoors. The Nest IQ cameras come with premium features like facial recognition, person alerts, and cloud storage. Learn more about the whole family of Nest cameras in our review.
For indoor cameras, find a stable surface like a bookshelf, table, or countertop. There are creative ways to hide your Nest cam if you don't want it to stand out. Avoid placing your camera in direct sunlight, because it could overheat. You should test the picture before using the camera to make sure nothing is blocking the lens.
For outdoor cameras, choose a spot out of direct sunlight or away from vegetation that could block the lens. And while the outdoor cameras are weatherproof, it’s smart to find a spot with some overhang to avoid snow and rain from blocking the view. The garage, side paths, back yard, and front porch are all good candidates for your new Nest camera.
If you’re installing a Nest Cam Outdoor, your router may be too far away or the home Wi-Fi signal might not be strong enough. Try moving the router closer to the camera or choose a spot outside closer to the router.
If you already have Nest products, they could be overtaking the signal from your new device. Place the new device closer to the old one or the router. Usually, the app will show guidance if this is the problem.
If you’re still having trouble pairing your Nest camera with your home Wi-Fi, visit our Nest camera troubleshooting article or Google Nest’s help page for more information.
Related articles
Sources
- Nest Support, “Nest Cam Outdoor Installation Guide”
- Nest Support, “Nest Cam IQ outdoor security camera installation guide”
- YouTube, “How to Setup and Install Nest Cam Indoor”
Recent Articles
Best Smoke Detectors of 2026
We reviewed the top fire and smoke alarms for your home in 2026. Protect your...
The Best Alexa-Compatible Home Security Systems
Best for built-in integration ADT Voice control of ADT system Works with Alexa Guard View...
Vivint App: A Complete Guide to Features and Use
Tour the Vivint app and discover its features, navigation, and customization capabilities. Learn how to...

Dangerous Apps for Kids: What Parents Need to Know in 2026
Dangerous apps for kids include ones you’ve heard of (TikTok, Instagram) and some new arrivals....