
Today, we're diving into the world of smart home gadgets with the Lockly Vision Elite Smart Lock and Video Doorbell. Priced at $500, this nifty device locks your doors and lets you video chat with whoever's knocking. Now, we'll be honest—we fumbled through the installation. This smart lock isn't the easiest to install—even for us pros. So, let's walk through the process and how you can avoid making the same mistakes.
How to Install the Lockly Vision Elite Smart Lock
Why you can trust SafeWise
products considered
250+
research hours in 25+ in-home tests
10k+
years of combined experience
176+
homes and people protected
10M+
For over 13 years, SafeWise experts have conducted independent research and testing to write unbiased, human reviews (not robots). Learn more.
Smart Lock + Video Doorbell
Video: How NOT to install a Lockly Elite Doorbell Lock
Subscribe to our YouTube channel for more how-tos, demos, and in-home reviews.
Before You Start: What's in the Box?
- Lockly Vision Elite
- Activation code card
- Screws
- Bolt assembly
- Strike plate and housing
- 2 Rechargeable lithium batteries
- 2 Physical keys
- Vision Connect Hub
- Vision door sensor
- USB and LAN cables
- Quick start guide
- Installation and user manual
- Doorbell decal
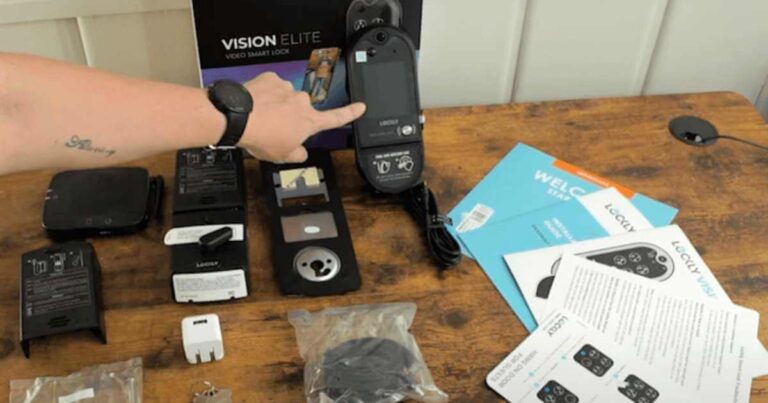
Image: Katie McEntire, SafeWise
How to install the Lockly Vision Elite Smart Lock
If you're feeling adventurous and want to mess up like we did, toss the instructions aside. But seriously, don't. Even if you've installed dozens of smart locks (like us), don't let overconfidence lead to needless mistakes (like us).
Pro tip
Charge one of the batteries before you start.
Step 1: Adding the new deadbolt
First things first, you'll need to remove your existing deadbolt. Then, you need to add the new deadbolt.
The Lockly deadbolt has two settings for different door sizes. Make sure you pick the right one—unlike us. The Elite deadbolt comes preset to 2-3/4 ". Need it shorter so it fits in the hole of your door? Adjust it to 2-3/8" by putting the deadbolt into a locked position by turning the crank on the side. (The crank kind of looks like a screw, and you can turn it with a flathead screwdriver.) Next, hold the metal plate and twist the deadbolt body till it snaps into place.
Push the deadbolt into the latch hole in the side of your door, making sure the black wire goes through the hole, too. Secure the deadbolt plate with the small screws (K) provided. And please make sure the bolt is in the locked position at this point.
Step 2: Setting up the exterior assembly
The exterior of the lock is the part that faces your visitors and comes with all the bells and whistles like a camera, doorbell, and biometric scanner. It's heavy, so get a buddy to help you out with this part to avoid frustration.
Peel off the film from the adhesive strips and ensure the torque blade (the metal stick) is vertical. Then, slide it through the deadbolt's slot and guide the cables underneath it.
Smart Lock + Video Doorbell
Step 3: Fixing the backplate
Take the adhesive strips off the backplate and guide the cables through the hole at the bottom of the backplate. Push the backplate against the door, ensuring the screw holes are aligned. Use the two large screws (F) to fix everything in place.
Now is a good time to test the lock with the keys provided. Make sure it locks and unlocks smoothly and that you can remove the keys. If any of this doesn't work, don't keep going. Take everything out, put it back in, and then try again.
Step 4: Wiring time
There are basically four connections you need to make: A1, B1, C1, D1 (the diagram in the instructions in a little intimidating). Make sure you tuck the wires back in so you can secure it onto the backplate.
Step 5: Insert the battery
Time to power things up. Slide the charged battery into the slot at the top of the lock. Tighten the screw (W) on the top side of the battery on the right side.
Now, poke the pin key into the program button (the little hole at the bottom of the battery) and hold it for 10 seconds. The lock will come to life, and you can do a little self-check to ensure everything is working correctly.
Connecting the wires from the exterior to the interior assembly is a bit like a puzzle. There are four connections to make, all laid out in a not-so-intimidating diagram.
You'll see plugs labeled A1 to A2, B1 to B2, and so on. Match the A1 and A2 (the golden connectors) and screw them together tightly. Next, plug B1 into B2. Match C1 to C2 and D1 to D2, and make sure that when you put them together, the red dots are on the same sides.
Once you've connected everything, the real challenge is stuffing it all back inside the casing to secure the back plate. Tuck the cables behind the rectangular cable rail on the interior panel and the grove along the side.
Turn the lock vertically and hold the wiring against the backside as you slide the unit onto the torque blade. Secure it with two small (H) screws.
Step 6: Don't skip the strike plate
The kit comes with a series of strike plates, one of which has a built-in sensor magnet (L). The strike plate is crucial for the lock to communicate its status. Without it, the lock gets confused—trust me on this. We didn't use the strike plate, and the lock beeped like crazy until we fixed it.
You should add the spacer when installing the strike plate if there's a gap between it and the door; that way, the plate will get a good connection. Make sure the red dot on the strike plate and the one on the deadbolt line up before securing it with the screws (F).
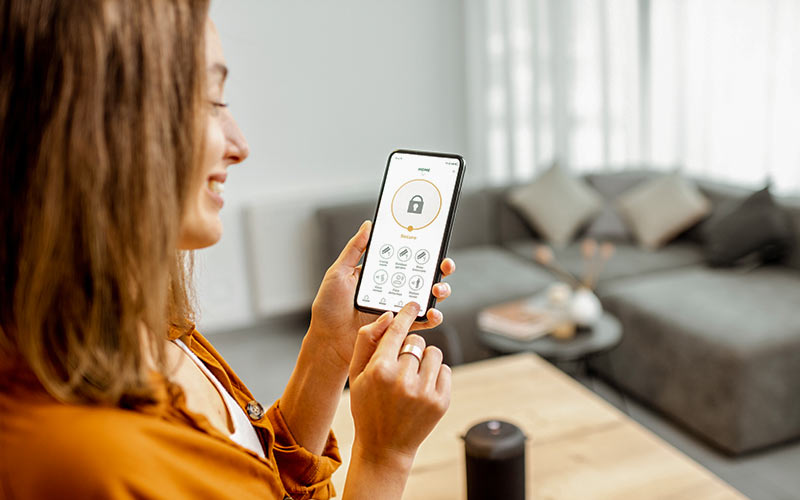
Step 7: Pair with the app
You're almost there! Now, it's time to pair your lock with the app. Grab the activation card to get started. Connect the hub to your home router and wait for the yellow light to blink. Scan the activation code, and sync up your device and app. Set your PIN, add your fingerprints, and you're good to go!
What did we learn?
Well, a lot. First, read the instructions—even if you think you're a pro. Second, get a friend to help; it's a two-person job. And third, make sure the pieces are correctly aligned; otherwise, you'll run into issues like we did.
So there you have it, folks! Our installation took around an hour and a half after all the backtracking from not doing it right the first time.
The Lockly Elite is a fantastic device if installed correctly. With a video doorbell and smart lock rolled into one, Lockly is a smart choice for any home. Just make sure you follow the steps, and you'll be golden.
Stay Safe and become a SafeWise Insider!
Sign up for our free weekly newsletter to get the best safety news, product info, and deals.
By signing up, you agree to our Terms and Conditions and Privacy Policy.
Disclaimers
Product prices and availability are accurate as of the date/time indicated and are subject to change. Any price and availability information displayed on Amazon at the time of purchase will apply to the purchase of this product. Safewise.com utilizes paid Amazon links.
Certain content that appears on this site comes from Amazon. This content is provided “as is” and is subject to change or removal at any time.
Recent Articles
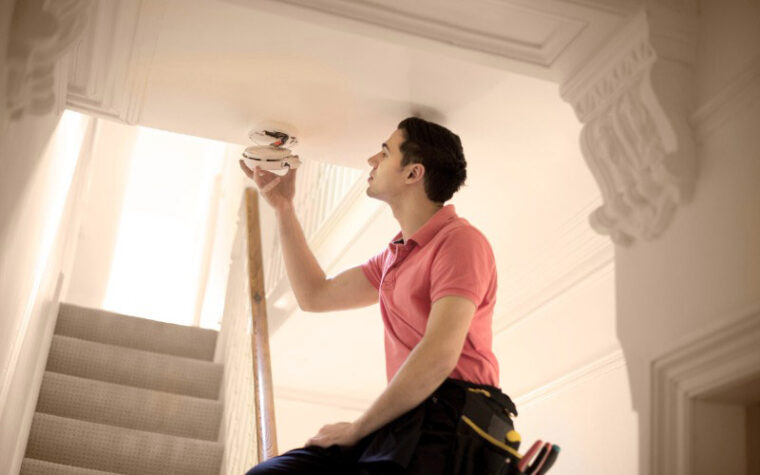
Best Smoke Detectors of 2026
We reviewed the top fire and smoke alarms for your home in 2026. Protect your...
The Best Alexa-Compatible Home Security Systems
Best for built-in integration ADT Voice control of ADT system Works with Alexa Guard View...

Vivint App: A Complete Guide to Features and Use
Tour the Vivint app and discover its features, navigation, and customization capabilities. Learn how to...

Dangerous Apps for Kids: What Parents Need to Know in 2026
Dangerous apps for kids include ones you’ve heard of (TikTok, Instagram) and some new arrivals....