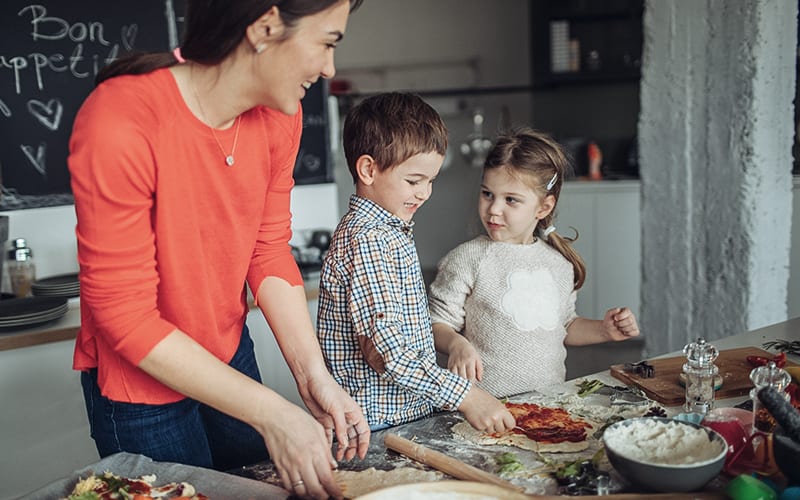
Cooking as a family creates memories (and skills) that will be cherished for a lifetime—whether it’s a hasty weeknight dinner in between homework and piano lessons or a big meal for a special occasion. But the kitchen can be one of the most dangerous places in the home. Our kitchen safety tips will help you turn dinner prep into a safe family affair.
Kitchen Safety Tips for Kids (and Parents!)
Why you can trust SafeWise
products considered
250+
research hours in 25+ in-home tests
10k+
years of combined experience
176+
homes and people protected
10M+
For over 13 years, SafeWise experts have conducted independent research and testing to write unbiased, human reviews (not robots). Learn more.

1. Kitchen safety tips for the whole family
It’s easy to get caught up in the excitement of a new recipe or holiday menu, but safety needs to come first when you bring little ones into the kitchen. We want to help you pull off a successful succulent feast that’s worry-free (at least when it comes to injury). Before donning your apron, make your kitchen safe with these tips.
Prep the space
Kitchen Prep Must-Have
Outlet Cover/Cord Shortener
$26.95
Amazon.com price as of post date. Offers and availability may vary by location and are subject to change. Read full disclaimer.
Make sure the kitchen is ready for novice helpers:
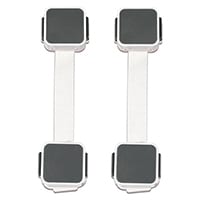
- Secure loose cords so little hands won’t pull small appliances off the counter.
- Place knife blocks out of children’s reach, or secure the knife drawer with a childproof latch.
- Lock away cleaning supplies, alcoholic beverages, and dangerous items like plastic wrap.
With very young children, have the ingredients prepped in advance so you can focus on safety instead of running around the kitchen. And don’t forget to keep a first-aid kit close by in case of injury.
Wash up
Get everyone in the habit of washing hands (including under fingernails and arms up to the elbow) in hot soapy water before getting to work in the kitchen. This is a crucial requirement for food safety.
One way to make handwashing fun and thorough is to sing while you wash your hands. A round of “Twinkle, Twinkle Little Star” is long enough to ensure those germs are circling the drain.
Review the rules
Best for reliability
Amerex B402
$95.99
*Amazon.com price as of post date. Offers and availability may vary by location and are subject to change. Read full disclaimer.
It’s a good idea to cover the ground rules of kitchen safety before embarking on a family cooking adventure. This sets the stage for tear-free culinary creativity. In addition to showing everyone where the fire extinguisher is, here are some rules to consider:
- Only grown-ups can grab and carry knives.
- An adult must supervise any knife work or chopping.
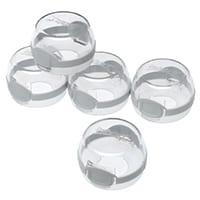
- No touching the stove or oven without supervision (depending on age).
- Watch out for hot foods as well as pots, bowls, lids, and other containers that have been on the stove or in the microwave. Don’t touch until you get the okay from an adult.
- Always turn pot handles inwards, to avoid accidental spills and burns.
- Use a clean utensil if you need to taste your creation—and only use it once. No double-dipping or fingers!
- Wash up again if you touch raw meat or other raw ingredients.
- Ask for help if you need it—don’t take risks in the kitchen.
Wear the right stuff
Kids apron and chef hat

This might seem silly, but loose hair and clothing can turn a cooking session into a kitchen nightmare. Remove any dangling jewelry, roll up sleeves, and pull back long hair. Non-skid shoes will help bypass slips. And make your kid feel like a pro with their very own apron.
Set up safety zones
Another way to improve your odds of injury-free meal prep is to establish safe zones where kids can work. These areas are free of loose cords and wires, heating implements (including the stove and appliances like toasters), sharp objects, and other potential hazards.
Depending on the age of your children, these zones may be as limited as a safety stool that corrals your young chef or a broader section of the counter, kitchen island, or dining table.
Use the right tools for kitchen safety for kids
Safety Zone Must-Have
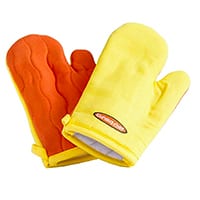
Keep both your recipe and your child’s skill level in mind when prepping for a family cooking session. Have safety tools like hot pads and oven mitts at the ready.
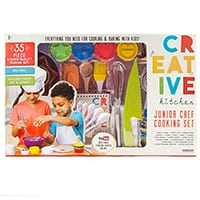
If you plan to cook with your kids regularly, consider investing in some kitchen tools designed specifically for little hands. When you give your child their own tools, it helps prevent accidents and makes them feel at home in the kitchen.
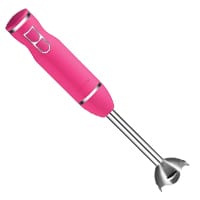
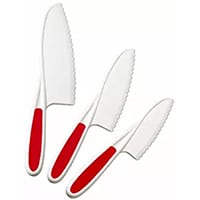
You can find kid-friendly knives, choppers, peelers, whisks, and other culinary instruments.
Supervise
Don’t be tempted to sit the kids down with a task and forget them. If you have children in the kitchen, be sure to supervise their activity closely—especially if they’re working with knives or other sharp utensils.
When they’re ready to start using the stove or other electrical appliances, be right there with them for the first several attempts. Your diligence will pay off later when they’re serving you breakfast in bed or tackling half of Thanksgiving dinner.
Clean up
Multi-surface cleaner
Mrs. Meyer’s Clean Day Multi-Surface Everyday Cleaner
$14.22 (3-pack)
*Amazon.com price as of post date. Offers and availability may vary by location and are subject to change. Read full disclaimer.
This might seem like a no-brainer, but when you have youngsters in the kitchen, it’s important to stay on top of cleaning as you go. If something spills, wipe it up immediately. Place used utensils in the dishwasher or sink. Put away sharp knives and other dangerous kitchen tools right after use. This will keep kids safe and teach them how to be neat, efficient cooks. Use natural cleaning products when possible.
Enjoy!
Don’t just make your kitchen safe—have fun. Talk and joke with your kids as you put together a culinary masterpiece. Praise their efforts and triumphs. And make sure you all sit down together to enjoy the fruits of your labors. If you’re hosting family or friends, brag about how awesome your kid’s cooking skills are. Most of all, take time to savor every delicious bite.
2. Here’s what kids can do in the kitchen (and when)
It’s fun to make dinner as a family. But to pull it off successfully, you need to know which culinary tasks your brood can handle. We understand that all kids are different, so use your best judgment when making kitchen assignments. But here’s a quick guide, grouped by age, to help you get everyone in on meal prep without a kitchen disaster.
Preschool
Youngsters between 2 and 5 can be great helpers in the kitchen—and it’s never too early to start fostering a love of all things culinary. Here are tasks that small hands can handle:
- Rinse fruits and veggies
- Stir
- Mash soft ingredients
- Measure dry ingredients
- Snap green beans
- Cut out cookies on rolled dough
- Help set the table
- Chop fruit with a kid-friendly knife
Kid kitchen tip
Include very young kids even if they can’t help with the main recipe. Give them flour, pasta, or dry beans and a pile of measuring cups and non-slip bowls. They’ll get to practice measuring and have fun without worrying about fudging tonight’s dinner.
Elementary
Kids in grammar school can handle more responsibility in the kitchen. Check out some new ways the budding chefs in your home can contribute:
- Measure wet ingredients
- Knead and roll dough
- Form patties, meatballs, cookies
- Grate cheese
- Peel garlic and onions
- Break eggs
- Cut with a kid-friendly knife
- Use a manual food chopper
Middle school
Once kids hit middle school, they can use more electrical appliances and tackle simple recipes from start to finish. Challenge your teen to expand their toothsome talents with these skills:
- Use a food processor or blender
- Chop with a chef’s knife
- Cook one-pot meals like chili
- Use the oven
- Bake muffins and quick breads
High school
Your chef-in-training is ready to get real once they hit high school. There’s pretty much nothing they can’t do at this point. But here are some gastronomic guidelines to help them take their cooking competence to the next level:
- Improve knife skills (dice, chop, slice, and mince)
- Plan and prepare meals
- Use all kitchen appliances
- Use an outdoor grill
- Make and use marinades
- Pan-fry foods on the stove
- Sauté vegetables
Top kitchen safety products for kids
Product | Best For | Price | Learn more |
| Protecting little hands from dangerous objects | $13.19 | View on Amazon | |
| Keeping the stove off-limits | $10.79 | View on Amazon | |
| Keeping microbes away naturally | $20.99 | View on Amazon |
Top cooking products for kid chefs
Product | Best For | Price | Learn more |
| Looking the part | $27.99 | View on Amazon | |
| Protecting small hands | $29.99 | View on Amazon | |
| Equipping a child chef | $39.99 | View on Amazon | |
| Introducing kids to blenders | $29.99 | View on Amazon | |
| Learning knife skills | $14.91 | View on Amazon |
4. Easy skillet pizza recipe
Now that your kitchen is equipped for junior chefs, it’s time to get cooking! To start you off, here’s a fun take on pizza that you can make as a family (what kid doesn’t love pizza?). There’s something in this recipe for kids of every age, so go wash your hands and get ready to cook.
Ingredients
- 1 pound pizza dough (we support pre-made dough you can pick up at the market)
- 1–2 teaspoons oil (we like olive oil, but vegetable will do)
- 1 cup pre-made pizza sauce
- 1/2–1 pound mozzarella cheese (you can also use parmesan, ricotta, or your favorite cheese)
- 1–2 cups toppings (veggies, pepperoni, pineapple—whatever tickles your fancy)
- Flour for dusting
Equipment
- Cheese grater
- Knives for chopping
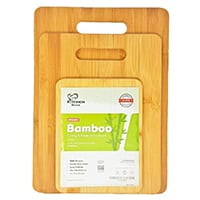
- Cutting board(s)
- Can opener (if any toppings or the sauce is in a can)
- Bowls for prepped toppings (optional)
- Measuring cups and spoons (if you like to be precise)
- Pastry board (optional)
- Rolling pin
- 10–12-inch skillet and lid
- Flat spatula
- Hot pads, oven mitts
- Pizza cutter (optional)
1. Get everything ready
Cooking goes more smoothly when you have everything prepped and ready to go. Pros call this mise en place (meez un plas) and it means “everything in its place.”
For this recipe, the mise en place involves chopping any veggies, grating the cheese, cooking up meat toppings like sausage, and having your equipment out and accessible. This gives you lots of opportunities to get young cooks in on the action, and plenty of time to let your pizza dough rest at room temperature.
2. Roll out the dough
If you have a pastry board, this is where you’ll use it. If not, you can use a counter or other clean, flat surface. Divide the dough in half.
Dust the board or counter with flour. You can also dust your rolling pin if it's made of wood. This keeps the dough from sticking as you roll it out (and makes it easier to transfer to the pan later).
Take one half of the dough and stretch or roll it out into a round that’s about an inch smaller than your skillet.
3. Preheat the skillet
Things are going to get pretty hot, so this part needs to be done by teens or adults. Turn up the oven to 500 degrees Fahrenheit or as high as it goes.
If needed, add a teaspoon or two of oil to the skillet (just enough to coat the bottom) and slide your skillet into the preheated oven. Heat it for about 8 minutes—you don’t want it scorching. If you used oil, watch it closely and remove the pan when it starts to shimmer so it doesn’t burn.
4. Cook the crust
This is another hot task, so assign it to older teens or grown-ups. If you didn’t add oil to your pan, sprinkle the hot skillet with a little bit of flour or cornmeal to help keep the crust from sticking.
Take your dough and press it into the pan (stretch it out if needed) and up the sides of the pan to create the crust edge. Be careful not to burn your hands—use a silicone glove or other protection if you’ve got it.
Brush the top of the dough with oil (you can also sprinkle dried herbs or minced garlic if you like) and put it in the oven until it starts to bubble up (about 10 minutes). You can deflate bubbles with the edge of a spatula or leave them, depending on your preference.
5. Add the goodies
After the crust starts to bubble, take the pan out of the oven and add the sauce. Next, sprinkle the pizza with shredded cheese. Finally, add all your other toppings. Help younger kids add toppings safely, so no little fingers get burned.
6. Finish up
When your pizza is piled with toppings, put it back in the oven for another 10–15 minutes, or until the cheese is gooey and golden. Clean up your prep stations while the pizza cooks.
When it’s finished, take the pizza out and let it sit for a few minutes before cutting. You can sprinkle fresh herbs (like basil) or drizzle balsamic vinegar on the pizza while it sits. When you’re ready, dig in. Bon appetit!
Disclaimer
Offers and availability may vary by location and are subject to change.
Product prices and availability are accurate as of the date/time indicated and are subject to change. Any price and availability information displayed on Amazon at the time of purchase will apply to the purchase of this product. Safewise.com utilizes paid Amazon links.
Certain content that appears on this site comes from Amazon. This content is provided "as is" and is subject to change or removal at any time.
Recent Articles

Best Smoke Detectors of 2026
We reviewed the top fire and smoke alarms for your home in 2026. Protect your...

The Best Alexa-Compatible Home Security Systems
Best for built-in integration ADT Voice control of ADT system Works with Alexa Guard View...

Vivint App: A Complete Guide to Features and Use
Tour the Vivint app and discover its features, navigation, and customization capabilities. Learn how to...

Dangerous Apps for Kids: What Parents Need to Know in 2026
Dangerous apps for kids include ones you’ve heard of (TikTok, Instagram) and some new arrivals....