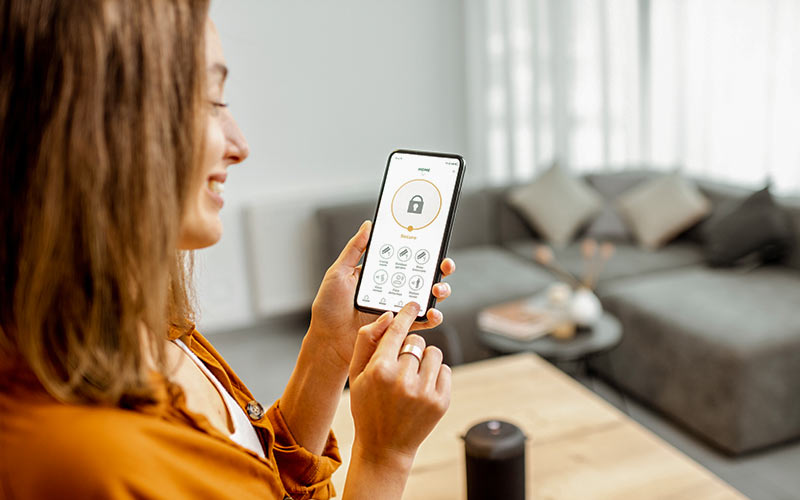
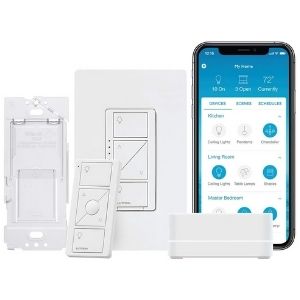
How to Install a Smart Switch

SafeWise experts have years of firsthand experience testing the products we recommend. Learn how we test and review

A smart light switch is one of the easiest ways to add smart home automation and voice commands to an existing light fixture. Unlike a smart light bulb, it doesn't require a ladder or footstool to install either. The trade-off is that you need to do some electrical work, but we'll walk you through all of the steps to quickly—and safely—install a smart switch.


1. Turn off the power

Safety should always be your top priority when working with electrical wires. Take a minute to find your breaker box, and turn off the power to the room where you'll be working.

Unlabeled breakers

If you're unfortunate enough to live in a home with unlabeled breakers, finding the right one is a trial-and-error process:

  1. Start by turning on all the light fixtures in your target room. It's possible that an electrical box will have multiple circuits—it never hurts to check when there are multiple switches in the same box.
  2. Go through your breakers one by one until the target lights turn off.
    • If the room isn't within your line of sight, consider having someone there to tell you when the light turns off so you don't need to run back and forth.
  3. Once the power's off, it's safe to proceed.

2. Remove the old light switch

Remove the screws

There are usually two sets of screws on the old light switch: one holding the wall plate on the switch (flat-head screws) and another keeping the switch in place in the electrical box (Phillips-head screws).

Light Bulb
Screwless wall plates

Some newer wall plates have snap-on panels that hide the screws—this usually detaches using a tab at the bottom of the plate.

Examine the wiring

Gently pull out the existing switch so you can look at the wiring. (Remember to turn off the breaker.):

  • Hot wires: One side of the outlet will have two screws holding two black wires. Turning the switch on connects the two wires to allow an electrical current to flow up to the light fixture.
    • The bottom screw (closest to the switch's off position) is the line wire, which comes up from the circuit breaker.
    • The top screw (closest to the switch's on position) is the load wire, which comes down from the light fixture—it's often a black wire but can be red.
  • Neutral wire: The neutral wire is usually a gray or white wire—often two wires with a wire nut in the back of the gang box. It's neutral because it doesn't connect to the switch and carries the current back to the breaker to complete the circuit.
  • Ground wire: The ground wire is usually a green wire or plain copper wire that attaches to another screw on the metal part of the switch.
  • Traveler wire: If you see a red wire coming off the opposite side of the switch from the hot wires, it's probably part of a three-way setup, so your smart light switch might not be compatible.

Quick tip: If you see only one bundle of wires coming from a single side of the switch box (even if one wire is white), you don't have a neutral wire.

Notepad
Take a picture

Although the wires are usually easy to distinguish by their colors and which direction they travel out of the box, it's helpful to take a reference photo of the setup before disconnecting any wires.

Remove the old switch

With the power off, use a screwdriver to loosen the screws holding the wires to the switch and disconnect the wires. The wires might wrap around the screws or be in slots on the back of the switch.

3. Install smart light switch

Installing the smart light switch is essentially the reverse of removing the old switch:

  1. Make sure the power's off.
  2. Attach the wires to their corresponding spots on the smart switch—the majority of switches will have labels on the switch, but you can also find a diagram in the user manual.
    • The switch may use slots, screws, or multicolored wires to attach to your wiring setup.
    • Many switches come with connectors like wire nuts and lever nuts to make the process easier.
    • If you're installing a lot of switches that don't come with connectors, then 2-conductor and 3-conductor lever nuts will make an easy, solid, safe connection.
  3. After attaching the wires, give them a little tug to make sure they're secure—you don't want them popping out as you push the wires and switch back into the gang box.
  4. Starting with the excess wires, push the new switch into the electrical box until it rests on the mounting holes.
    • Know that smart switches are bulkier than normal light switches—don't try to force them into a box that's too small. You can replace or extend the box with one from the hardware store, but old boxes aren't easy to remove without damaging the drywall.
  5. Fasten the switch in place with the correct screws. (It should come with screws, but you can repurpose the ones from the old switch too.)
  6. Attach the wall plate—some smart switches don't include a wall plate—you might need to buy it separately.
  7. Turn the power back on and test the switch.
Checklist
Not done yet

While this would be the end of the process for a normal toggle switch, you still need to set up the smart dimmer switch to unlock its best features.

4. Set up the smart switch

After installation comes the fun part—setting up the smart features. This way you can control the switch with your smartphone from the couch or automate your home to run without lifting a finger.

Whether you're using a standalone Wi-Fi light switch or a Z-Wave/Zigbee switch that requires a hub, the process is more or less the same.

  1. Download the switch's mobile app, create an account, and select Add Device from the menu.
    • If the switch uses a hub, you'll need to set this up before moving on to the next step.
  2. Follow the instructions for putting the switch in pairing or setup mode.
  3. Enter your Wi-Fi credentials if you haven't already.
  4. After the switch connects to the app, you can name it and assign it to the appropriate room in your home.
  5. You should now be able to control the switch with the app—or a voice command, depending on its compatibility with Amazon Alexa and Google Assistant.
Light Bulb
Create routines

Manually controlling the switch from your smart device is convenient, but you can level up by creating routines to control it automatically:

  • Try scheduling the porch light to turn on at sunset and off on sunrise.
  • Try linking the switch to other rooms to control them all at once.
  • Try setting an auto-off timer on the bathroom ventilation fan for each time you turn it on.
  • Try turning on a security camera when you turn the light off in the garage.

FAQ

If it's your first time installing a smart light switch, pencil in 15–45 minutes for installation and setup. There's a bit of a learning curve as you read the installation manual and follow the steps. Subsequent switches will probably take 15 minutes or less after you learn the process.

Installing a smart light without a neutral wire requires a switch that doesn't need one, like Lutron Caseta Wireless. The installation process is similar: you connect the line, load, and ground like a normal light switch. The alternative is paying an electrician to run new wiring with a neutral wire.

As long as the model supports it—like some from Wemo, Kasa, and C by GE—you can install smart light switches in multi-way setups. The main difference for installing these is that you'll connect traveler wires between the switches. (These should be in place from a previous three-way setup, or you'll need to call an electrician to put some in.)

You can also simulate a three-way setup with lights on different circuits by linking them in the mobile app. This way, multiple switches can react when you use a specific one.

Build your smart home sanctuary with our weekly smart home tips!
Sign up to get the latest smart home tips and product reviews directly in your inbox. For free!

By signing up, you agree to our Terms and Conditions and Privacy Policy.

Related articles on SafeWise


Disclaimers

Certain content that appears on this site comes from Amazon. This content is provided “as is” and is subject to change or removal at any time. Safewise.com utilizes paid Amazon links.

†Google, Google Nest, Google Assistant, and other related marks are trademarks of Google LLC.

John Carlsen
Written by
John Carlsen
John is a technology journalist specializing in smart home devices, security cameras, and home security systems. He has over a decade of experience researching, testing, and reviewing the latest tech—he was the Smart Home Editor for Top Ten Reviews and wrote for ASecureLife before joining SafeWise as a Staff Writer in 2020. John holds a Bachelor's degree in Communications, Journalism emphasis from Utah Valley University. In his spare time, he enjoys hiking, photography, cooking, and starting countless DIY projects he has yet to complete.

Recent Articles

medical alert products on an illustrated background
Best Medical Alert Systems
See which medical alert system is the best to keep you and your loved one...
Man and woman couple wife husband set up surveillance security camera
Best Apartment Security Systems
These renter-friendly apartment security systems help keep you safe and require less commitment than your...
woman adjusting thermostat in bright home
Best Home Security Systems
After thousands of hours of tests and research, we picked Vivint and SimpliSafe as the...
photo of Canadian house
The Best Home Security Systems in Canada
Find the best home alarm system to protect your house. We looked at price, features,...