Frontpoint is a DIY residential security system but you don’t have to fly solo when it comes to installation. We’ve put together this guide to help you with everything from Frontpoint wired doorbell camera installation to setting up your Frontpoint hub for the first time.
Frontpoint Installation Guide
Why you can trust SafeWise
products considered
250+
research hours in 25+ in-home tests
10k+
years of combined experience
176+
homes and people protected
10M+
For over 13 years, SafeWise experts have conducted independent research and testing to write unbiased, human reviews (not robots). Learn more.
Rebecca helps you stay safe without the stress | Managing Editor | 12+ yrs in home + personal security | 30+ yrs in journalism | Expertise featured by NYT, PBS, Today Show, and more
Frontpoint literally makes installation as easy as 1-2-3. All of your equipment comes boxed and marked with “Step 1,” Step 2,” and so on. Just open each box in order, and you’ll have your system up and working in as little as 30 minutes.
Best of all, you don’t have to be a setup wiz because Frontpoint provides its own Setup Wizard in the mobile app. This is basically DIY installation on autopilot.
But in case you could use a little help with autopilot (like I do) we’ll walk you through each step. Plus, we’ve got expert tips to get your Frontpoint home security system installed and working as if it was put in by a pro.

Image: Cathy Habas, SafeWise
1. Download the Frontpoint app
Before you get started, grab your smartphone or tablet. You use the Frontpoint app to set up and control your security system.
The idea is that you can do everything live on the app while you move around your home and install different sensors and other Frontpoint equipment.
If you don’t want to set up your system on a mobile device, you can call Frontpoint and activate everything over the phone.
- Go to my.frontpointsecurity.com/setup OR open the Frontpoint mobile app for iOS or Android.
- Log into your Frontpoint account. Your system is pre-programmed, so just enter your phone number and you’ll be ready to go.
- Follow the on-screen tutorial.
- If you’re setting up your system for the first time, tap on Setup Your New System at the bottom of the login page.
- From there, the Setup Wizard really does everything for you.
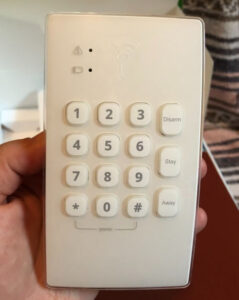
2. Set up the hub and keypad
The hub is the control center of your security system, but you can also use the keypad for similar functions. Frontpoint used to have a traditional control panel but replaced it with the more streamlined hub.
If you prefer a more hands-on experience, you can add a touchpoint screen to your system. But with the hub and the mobile app, there’s no real need for the extra expense.
- Open the box labeled Step 2.
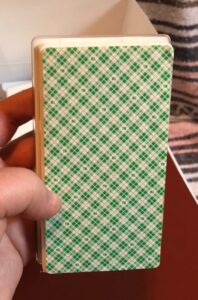
- Inside, you’ve got two boxes. The bigger one is the hub and the smaller one is the keypad.
- Like all of Frontpoint’s equipment, the keypad is peel and stick. All you have to do is peel off the backing and mount it to the wall.
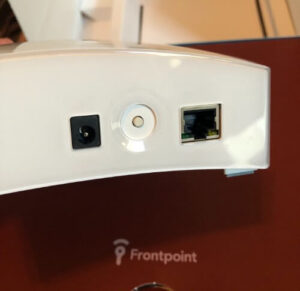
- The hub is a curved, white square box, similar to a router for your Wi-Fi network.
- You also get a system feature guide that covers everything you need to know to decode and control your system—things like how to arm and disarm the system.
- Under the hub and keypad boxes, there’s an Ethernet cable and a power cord.

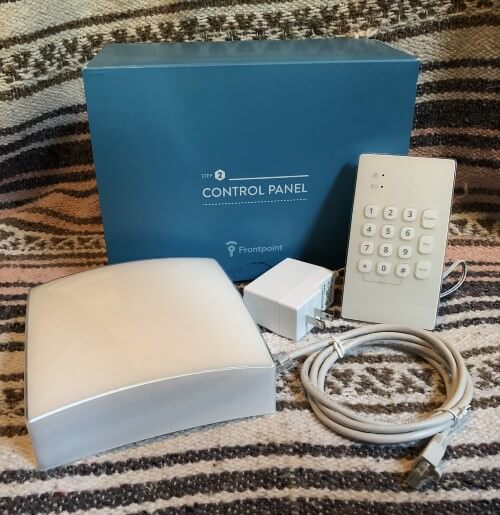
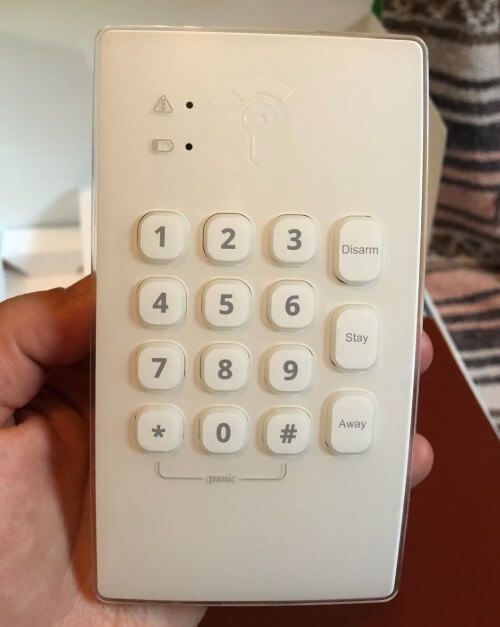

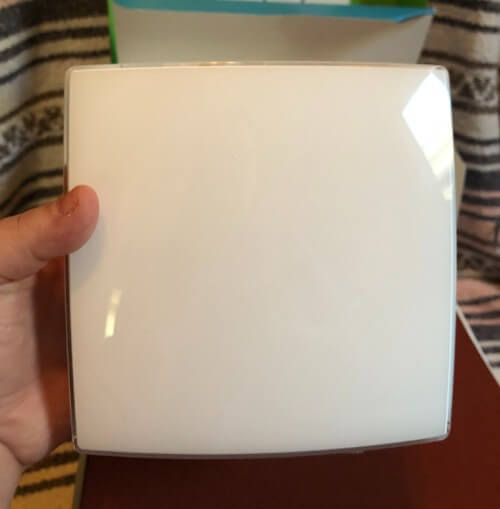

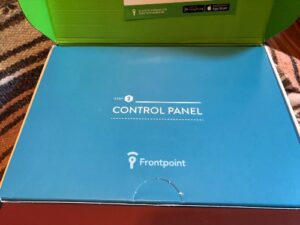


Images: Cathy Habas, SafeWise
Security extra
Cables tie you down to a location that’s near both an outlet and your network router. But it also lets you be more covert—a burglar wouldn’t necessarily be able to recognize the hub, which means lower odds of tampering (even though you get Frontpoint’s Crash and Smash protection).
- Plug in both cords to the hub.
- After a few seconds, you’ll see an LED Frontpoint key light up on the hub. The color of the key lets you know the status of your system.
- Red means Arm Away.
- Yellow means Arm Stay.
- Green means Disarmed.
- Blue means there’s something wrong with the system and you need to check it.
- White means the system is updating or learning something—it usually happens when you set up new sensors and pair them to the hub.
- The key should be white while you set up your Frontpoint system.
- Go back to the Frontpoint app.
- Select Equipment Setup. This is where you’ll set up all of your equipment.
- Because your system comes pre-programmed, it will take a few seconds for the app to download all of your account information. The cool part is that all of your sensors, cameras, and smart home devices will already be listed and ready to go.
- On the next screen there are three sections: System Control, Sensors, and Home Automation.
- System Control is where you activate your hub, keypad, and touchscreen if you added that to your system.
- Select the Sensors section to set up motion detectors, window and door sensors, smoke, and carbon monoxide sensors, and others like glass break and flood sensors.
- Select Home Automation if you’re adding smart locks and smart lighting to your home security system. For the purposes of this guide, we’re going to focus on sensor setup.
- Select System Control. The wizard will finish activating the hub and keypad so you can pair them with your sensors.
- Once the hub is set up, go to the Sensors section in the Equipment Setup wizard in the app.
- All of the sensors that came with your system should be listed. To pair them, select each one (one at a time) and follow the online prompts.
3. Position the motion sensor
The motion sensor can detect motion across a large area like a hallway or room. It’s best to place your motion sensor in bigger areas that have higher traffic.
Frontpoint’s motion sensor can pick up movement up to 25 feet away and within an 80-degree range.
Expert tip
If you install the motion sensor near the front door, you don’t need to use one of your door sensors there. That frees up at least one extra sensor to cover more first-floor entrances.
- Determine where you want to place your motion sensor. It should be between four and five feet above the floor.
- You can stick the motion sensor to the wall with the enclosed adhesive or place it on a shelf.
- Test the motion detector to make sure it’s placed properly.
- Press the button on the bottom of the sensor to put it in testing mode. You should see a red light.
- Walk away from the sensor’s coverage area until the red light goes off.
- Walk back into the sensor’s coverage area. If the light comes back on, it’s working. You don’t have turn off test mode. After 60 seconds with no motion detected, it will automatically switch to its regular mode.
- If the light doesn’t come back on, reposition the motion detector and test it again.
4. Place door and window sensors
Frontpoint’s basic package comes with two window and door sensors. They look the same—the only difference is how you place them for the best security.
Expert tip
Your home’s most vulnerable entrances are first-floor doors and windows. For the best protection, install a sensor on each window or door that an intruder could potentially use to get into your home.
The door and window sensors come in two parts. The larger part is the transmitter and the smaller one is a magnet.
Each section is affixed separately, but to trigger a warning they need to be placed within three-quarters of an inch to one another. (Hint—that’s about the width of your thumb.)
Install a door sensor
- Pick the door(s) you want to guard with a sensor.
- Take note of the style of your door.
- If the door is flush with the door frame, we recommend placing the transmitter on the frame and the smaller magnet on the door.
- If you have decorative molding that isn’t flush, it can be easier to place the magnet on the frame and the larger transmitter on the door.
- Clean the area where you plan to place each half of the sensor, and make sure it’s dry before you stick it on the door.
- Remove the backing from the adhesive and put the sensor where you want it.
- Press one half of the door sensor onto the frame or door and hold it for at least 30 seconds.
- Repeat with the other half.
Need extra help?
If you have a truly unique door and you're stumped about where to place what, go to Frontpoint’s online Support Center for more door sensor installation instructions.
Install a window sensor
- Pick the window you want to monitor with a sensor.
- Look at the style of your window.
- Where you position each half of the window sensor depends on how big the moving portion of the window pane is compared to the stationary part.
- For windows that move up and down with two locks on the top of the bottom pane, it’s best to place the sensor in the middle, between the two locks or along the bottom.
- For windows that move side-to-side, place the sensor on the side where the window closes. It doesn’t matter how high up or low the sensor is as long as each half is within three quarters of an inch of the other.
- Clean the part of the window where you want to install the sensor. Make sure it’s dry before you try to place the sensor.
- Remove the adhesive backing.
- Press and hold each half of the sensor for 30 seconds to adhere.
Need extra help?
If you’re not sure of the best way to install your window sensor, go to Frontpoint’s online Support Center and check out the Resource Center for more specific instructions.
5. Install Frontpoint’s doorbell camera
Frontpoint’s wired doorbell camera is slim, sleek, and easy to install. But there is some wiring required.
If you don’t currently have a wired doorbell, you might need to call in a pro to help install the Frontpoint Wired Doorbell Camera.
What you need to install the wired doorbell camera
- Doorbell camera and camera mounting plate
- Mounting screws and wall anchors (if needed)
- Philips screwdriver
Frontpoint wired doorbell camera installation
Safety note: Turn off power at the breaker before you get started with any wiring project, including this one.
We'll be honest; the wiring installation here can get tricky. Pay careful attention to these steps, and don't hesitate to ask for help from a friend or Frontpoint employee.
- Use the screwdriver to remove your existing doorbell.
- Unwire the doorbell.
- Use the included screws to attach the mounting plate for the doorbell camera.
- Make sure you can get to the wires through the hole in the middle of the mounting plate.
- Pull the wires through the center of the mounting plate.
- Slightly loosen the two contact screws (these are not the screws that hold the mounting plate in place) near the bottom of the plate. You want to leave enough room for the wires to pass through.
- Insert one wire into each screw and tighten both screws.
- Make sure the wires are secure by giving them a (very) small tug.
- Use the center hole to tuck in any leftover wiring.
- Place the Frontpoint doorbell camera over the mounting plate.
- Snap the doorbell into place on the mounting plate—listen for a click.
- After the doorbell clicks into place, there’s another screw at the bottom of the mounting plate. Tighten that screw to secure the doorbell.
- Watch for the light at the center of the doorbell to activate. That means your Skybell doorbell camera is powering up.
- A blue pulsing light means the battery is charging. The battery needs to be fully charged before you can pair it with your Frontpoint hub.
- The camera is fully charged when it starts blinking red and green.
- Go to the Frontpoint mobile app and follow the prompts to sync the doorbell camera with your system.
Learn more
We've got a complete guide to all of Frontpoint's security cameras. Check it out for the pros and cons of Frontpoint's indoor, outdoor, and doorbell cameras.
6. Put up indoor and outdoor cameras
Frontpoint’s wireless security cameras are as simple to set up as the rest of the Frontpoint security system. But because cameras are updated often, there’s not a one-size-fits-all approach to setup and installation.
For the most accurate installation information for your camera model, take a peek at Frontpoint’s online installation resources.
Security camera installation tips
Once your wireless cameras are activated as part of your Frontpoint home security system, it’s time to give them a place to live.
Here are our tips for security camera placement that’s effective, discreet, and won’t ruin your home’s decor.
- Keep cameras out of your line of sight: Make your cameras harder to spot by placing them higher up on a bookshelf or near a curtain rod. Outside cameras can hide out under eaves or a porch overhang.
- Use plants for camouflage: If you want to go a little bit 007, you can hide smaller wireless cameras in plants or behind large foliage. Just make sure you don’t obscure the lens, and consider whether tiny hands or paws might knock it out of place.
- Watch key entrances: If you only have one or two outdoor security cameras, put them where they can do the most good. Top spots include the front or back door, garage, and driveway.
- Check your Wi-Fi signal: Wireless cameras rely on your home Wi-Fi network to stay connected to your security system. Make sure that your cameras get a strong signal wherever you place them.
Expert tip
You can boost your home Wi-Fi signal with a Wi-Fi extender or mesh network. Both are easy to install and can expand your Wi-Fi signal up to 5,000 feet depending on the booster you pick.
- Be careful with windows: It’s tempting to give your indoor security camera double-duty by pointing it out the window at night. But many indoor cameras aren’t designed to pick up images through a window, so test yours out before relying on one camera for both indoor and outdoor surveillance.
7. Activate your system
After you’ve placed all of your sensors, it’s time to put your Frontpoint home security system to work.
The final step is a call to Frontpoint to activate your system and verify that everything is working the way it should.
Before you call, be prepared to confirm the following information:
- Home address
- Home phone and mobile number(s)
- Emergency contacts
- Authorized users
You’ll also set up your emergency pass code and master code. These are the codes that Frontpoint uses to verify your identity and distinguish a real emergency from a false alarm.
Once everything is verified, Frontpoint will give your system a test and answer any questions you have about how to use the system or what to do if the alarm is triggered.
Call Frontpoint at 1-877-602-5276 to activate your system.
8. Add new devices to your system
One of the coolest things about Frontpoint is that you can add more sensors, new security cameras, or extra smart home devices to your security system at any time.
Some of the things you can add to your system include glass break sensors, flood sensors, smoke and carbon monoxide sensors, additional security cameras, and smart home equipment like lights and smart locks.
When you add to your system, set up is even easier than your initial setup.
- Open the box with your new Frontpoint equipment.
- Follow any provided instructions.
- Go into your Frontpoint app and select Equipment Setup.
- You should see your new devices listed.
- Pick the device you want to set up, and follow the Setup Wizard to sync the new gadgets to your Frontpoint hub.
Check out our other installation guides to help you choose the best location for each device:
Frontpoint Installation FAQ
Yes. At any time you can contact Frontpoint’s customer service support team at 1-877-602-5276.
Frontpoint also has a big library of online tutorials, instructions, and videos to help walk you through the installation process.
Unfortunately, Frontpoint's one of the few DIY security brands that doesn't give you the option to pay for pro installation. If you like everything about Frontpoint but want someone to put up all the equipment, try Vivint. Compare these two competitors in our Frontpoint vs. Vivint review.
When you activate your system, Frontpoint will test the system to make sure everything is working as it should. You can also call Frontpoint at any time to test your system and make sure it’s still operating as it should.
Because Frontpoint sensors are installed with adhesive and not hardwired into your home’s electrical system, you can move sensors whenever you want.
You don’t have to do anything other than affix new adhesive backing to make sure the sensor stays in place. A loose or worn backing can cause a frightening false alarm if one of your sensors falls off the wall in the middle of the night (we know from experience).
Yes, we think Frontpoint's easier to install than some other DIY brands, like SimpliSafe. The difference is that Frontpoint's sensors are already paired to the base station, so you get to skip a step during setup. We also thought it was easier to follow instructions on the Frontpoint app than on the SimpliSafe keypad.
Learn more about these two competitors in our SimpliSafe vs. Frontpoint review.
Yes, Frontpoint takes a hands-on approach to alarm permits. If you live in an area that requires a permit for your security system, Frontpoint will email or text you to make sure you get the system registered. They'll also share information you need for alarm permit forms, like their license number and address.
Getting a permit helps you and Frontpoint avoid false alarm fees and can speed up the police response time, so don't skip this step.
Read answers to more Frontpoint FAQs.
More Frontpoint resources on SafeWise
Recent Articles
Best Smoke Detectors of 2026
We reviewed the top fire and smoke alarms for your home in 2026. Protect your...
The Best Alexa-Compatible Home Security Systems
Best for built-in integration ADT Voice control of ADT system Works with Alexa Guard View...

Vivint App: A Complete Guide to Features and Use
Tour the Vivint app and discover its features, navigation, and customization capabilities. Learn how to...

Dangerous Apps for Kids: What Parents Need to Know in 2026
Dangerous apps for kids include ones you’ve heard of (TikTok, Instagram) and some new arrivals....