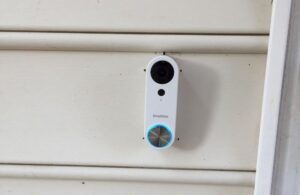
The SimpliSafe Video Doorbell Pro is a great addition to the SimpliSafe security system, which is one of our top no-monthly-fee home security systems, but we like that it doesn't require one. It's also a cinch to install and set up. Here's a step-by-step guide to installing your new SimpliSafe video doorbell.
How to Install the SimpliSafe Doorbell
Why you can trust SafeWise
products considered
250+
research hours in 25+ in-home tests
10k+
years of combined experience
176+
homes and people protected
10M+
For over 13 years, SafeWise experts have conducted independent research and testing to write unbiased, human reviews (not robots). Learn more.
With 9 years in journalism, John focuses on smart home tech, previously writing for ASecureLife and serving as Smart Home Editor at Top Ten Reviews.
How to install the SimpliSafe doorbell
Stay Safe and become a SafeWise Insider!
Sign up for our free weekly newsletter to get the best safety news, product info, and deals.
By signing up, you agree to our Terms and Conditions and Privacy Policy.
1. Remove your old doorbell
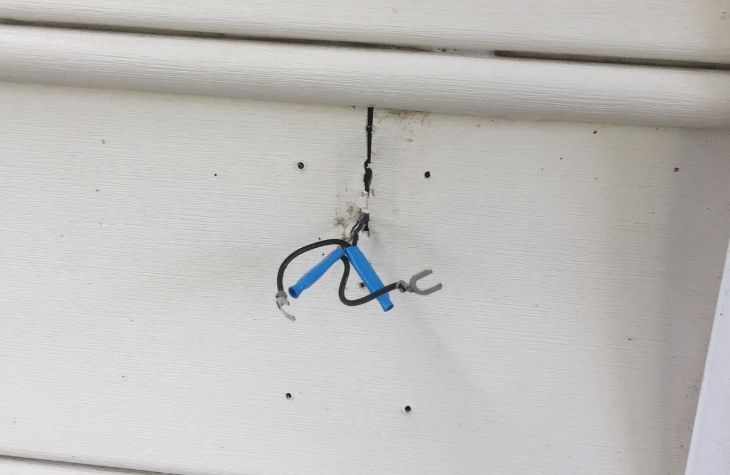
Image: SafeWise
You'll need to turn the power off to your old doorbell before removing it from the wall. Your circuit breaker should be the first stop when working with electrical wiring. If you're lucky, the doorbell's breaker switch will have clear labels so it's easy to turn off.
If your box doesn't have any labels—or the labels aren't very descriptive—you'll need to turn them off one at a time until pushing the button no longer triggers a doorbell chime.
After the power's off, you can remove the old doorbell from the wall with a screwdriver. You also need to detach the wires from the back of the button. You can bend the wires or wrap them around something like a stick to keep them from falling into the wall while grabbing your SimpliSafe doorbell mounting plate.
Protect your paint
Sometimes paint from the wall can cover part of your old doorbell button and keep it firmly on the wall even after undoing the mounting screws. If this happens, don't force the doorbell off (you could damage the paint). Instead, take a utility knife and trace it slowly around the button to cut the paint, making it easier to remove.
2. Mount your SimpliSafe doorbell
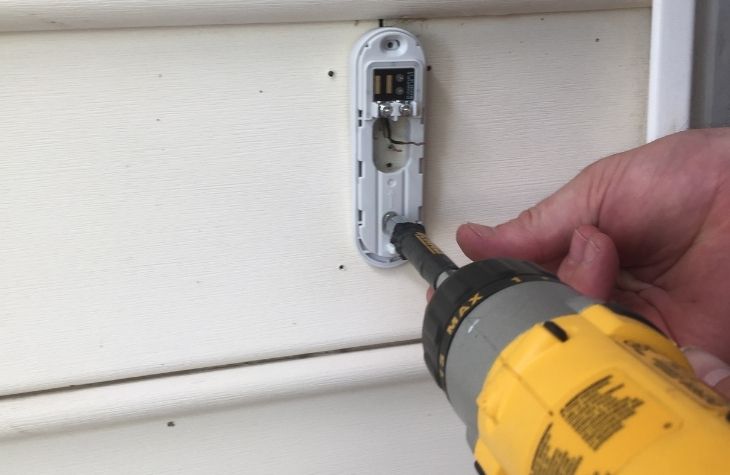
Image: SafeWise
Take the SimpliSafe doorbell's mounting bracket and pull the exposed doorbell wiring through the large gap in the middle so you can rest it on the wall.
1. Mark the screw holes on your wall with a pencil and drill pilot holes for the screws. If mounting the video doorbell on wood, you can attach it to the wall with the included 1-inch screws without any anchors.
- You need a 3/16-inch masonry drill bit for the pilot holes for brick, stone, and stucco. After drilling the holes, insert the plastic wall anchors and screw the bracket in place.
How do I install my SimpliSafe doorbell on a side wall?
The SimpliSafe Video Doorbell Pro comes with an angled base that can point the camera down or up, but there's no left-right angle bracket in the box for aiming it to the side. Contact SimpliSafe customer support, and they'll send you a left-right bracket.
2. After screwing the bracket in place, you can attach the doorbell wiring to the two wiring terminals on the front of the unit. It doesn't matter which wire connects to which terminal as long as they're snug around each screw before tightening.
3. Slide the doorbell down the mounting bracket until it clicks in place.
- After the doorbell's in place, you can use the mini screwdriver and small lock screw that came in the box to lock it in place.
3. Power on your SimpliSafe doorbell
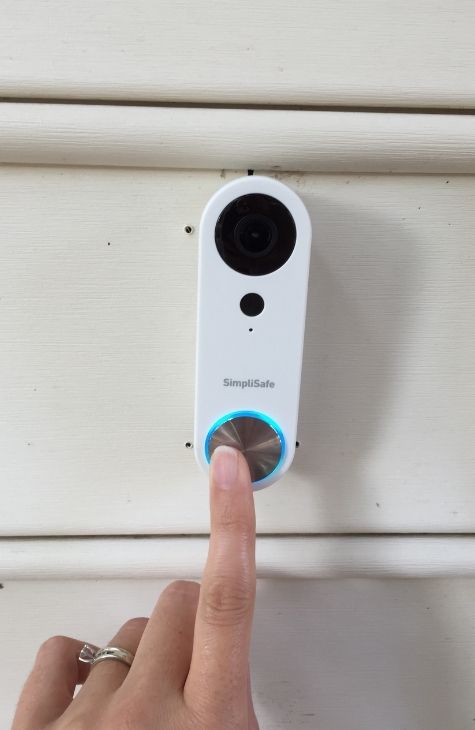
Image: SafeWise
After installation, turn the power supply back on and test the doorbell. Press the button to make sure it lights up and triggers the chime inside your home.
Several things can prevent your smart doorbell from ringing:
- If you don't see any lights on the doorbell, you may need to detach it from the mount to check that the wiring has a good connection to the wiring terminals.
- If the doorbell chime doesn't ring—or makes a buzzing sound—your wiring might not be compatible, so you'll need to request a chime connector from SimpliSafe.
- The SimpliSafe Video Doorbell Pro is only compatible with mechanical doorbell chimes—it doesn't work with digital or wireless chimes.
If everything checks out and you're still having problems, contacting SimpliSafe customer support or hopping on the SimpliSafe Community is a good idea.
4. Set up your SimpliSafe doorbell
With your doorbell powered on, it's time to set it up. The SimpliSafe app will guide you through the process, but here's a quick rundown of the steps you can expect after downloading it and logging in:
- Choose Cameras from the menu bar and tap "Add Camera."
- Select the Video Doorbell Pro.
- The light on the front of the doorbell flashes white when it's ready for setup.
- Name the doorbell and enter your Wi-Fi credentials.
- The doorbell requires a 2.4 GHz Wi-Fi connection, so make sure your network isn't running solely in 5 GHz mode.
- Click "Get Your Code" to generate a QR code on your phone. This is how you tell the Video Doorbell Pro your Wi-Fi information.
- Hold your phone in front of the doorbell camera until its white light stops flashing. There will also be a message in the SimpliSafe app that confirms you're connected.
- The smart device will probably download some updates and restart. Now it's all yours.
How to install the SimpliSafe doorbell FAQ
Yes, you need to wire the SimpliSafe Video Doorbell Pro into existing doorbell wiring connected to a mechanical doorbell chime.
While the doorbell works best with a mechanical door chime, you can power it directly with an 8- to 24-volt AC doorbell transformer. You'll still receive notifications on the SimpliSafe app, but there won't be any chime sounds in your home without a SimpliSafe Base Station.
Yes, the SimpliSafe Video Doorbell Pro will sound a chime on the Base Station if you have a SimpliSafe security system. While there aren't any custom chime tones, you can adjust the chime volume.
Read answers to more SimpliSafe FAQs.
Compare SimpliSafe to other home security brands
Brand | Self-monitoring option | Monthly cost
| Starter equipment price | Break-in deterrent(s)
| Smart home compatibility
| Learn more |
| $28.99/mo.* | $0.00 | Smart AI detection, 2-way talk, Yard sign/window decal | Google, Z-Wave | View packages | ||
| $22.80/mo. | $250.96 | Active Guard, AI detection, Live agent intervention, Siren | Amazon, | View packages | ||
| $24.99/mo. | $199.00 | Smart Deter lurker detection, Lights, Sounds | Amazon, Google, Z-Wave | View packages | ||
| $19.99/mo. | Custom | Motion sensors/cameras, Glass break sensor, Siren | Amazon, Google | View packages | ||
| $26.99/mo. | $65.00 | Acoustic/vibration sensors, AI-powered alerts, Smart security integration | Amazon, Google, Apple, Z-Wave, Zigbee | View packages |


Info current as of post date. Offers and availability may vary by location and are subject to change. *ADT $28.99 for landline system only. Full ADT disclaimer
Info current as of post date. Offers and availability may vary by location and are subject to change.
Full ADT disclaimer
SimpliSafe stands out as a flexible and affordable home security solution, offering both DIY and professional installation. With monthly monitoring starting at $31.99 and no required contracts, it appeals to users who want reliability without being locked into long-term commitments. SimpliSafe also supports self-monitoring, making it a great option for users who prefer to manage their own security. Its starter equipment is reasonably priced at $249.96, and it integrates with Amazon Alexa and Google Assistant, providing solid smart home compatibility.
Vivint, in contrast, focuses on professionally installed, high-end systems with advanced smart home integration. It starts at a higher monthly cost of $29.99 and requires professional installation. While Vivint doesn’t offer a self-monitoring option, it does support a range of smart home platforms including Amazon, Google, and Z-Wave. Equipment starts at $599.00, and while a contract isn’t required upfront, financing often locks users into long-term agreements. Vivint is ideal for those who want a full-featured, hands-off security system with robust automation.
ADT is one of the most recognizable names in home security, known for its trusted reputation. It also requires professional installation and contracts, with monitoring starting at $28.99 per month. While ADT doesn’t support self-monitoring, it often offers equipment at no upfront cost with a service contract. It integrates with Google Assistant and Z-Wave devices, catering to smart home users who want established service from a legacy provider.
Cove offers a customer-friendly approach, with DIY or optional professional installation and no long-term contracts (unless financing is involved). Monitoring starts at a budget-friendly $17.99 per month, though the exact cost of equipment is determined through an online quiz. Unlike SimpliSafe, Cove doesn’t offer self-monitoring but does support Amazon Alexa and Google Assistant. It’s a strong option for those seeking a smooth user experience and excellent customer service at a lower price point.
Recent Articles
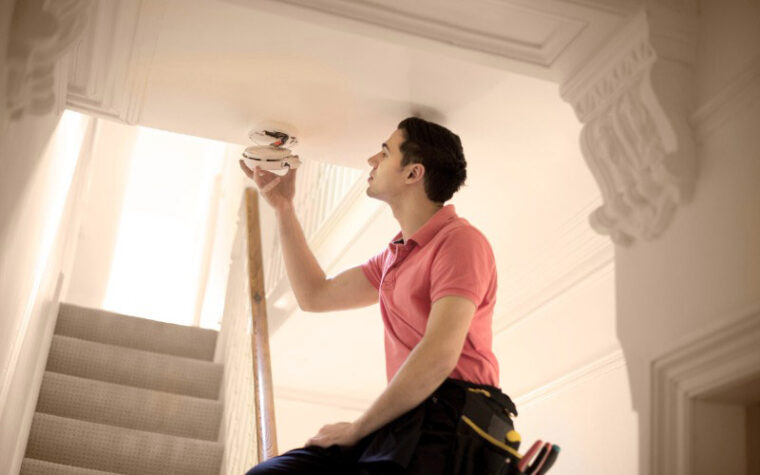
Best Smoke Detectors of 2026
We reviewed the top fire and smoke alarms for your home in 2026. Protect your...
The Best Alexa-Compatible Home Security Systems
Best for built-in integration ADT Voice control of ADT system Works with Alexa Guard View...

Vivint App: A Complete Guide to Features and Use
Tour the Vivint app and discover its features, navigation, and customization capabilities. Learn how to...

Dangerous Apps for Kids: What Parents Need to Know in 2026
Dangerous apps for kids include ones you’ve heard of (TikTok, Instagram) and some new arrivals....